カテゴリー別アーカイブ: 第6回 半田付け
//php if ( is_archive() || is_search() ) : // Only display excerpts for archives and search. ?>
第6回目の学習目標
- 基盤へ多目的リモコンの半田付けを行い、基盤への半田付けの基礎を身に着ける
授業構成
- 全体の流れについて
- 完成図を紹介
- 配線図の理解
- Neo Vanilla Shieldへの半田付け
- 多目的リモコンの動作確認
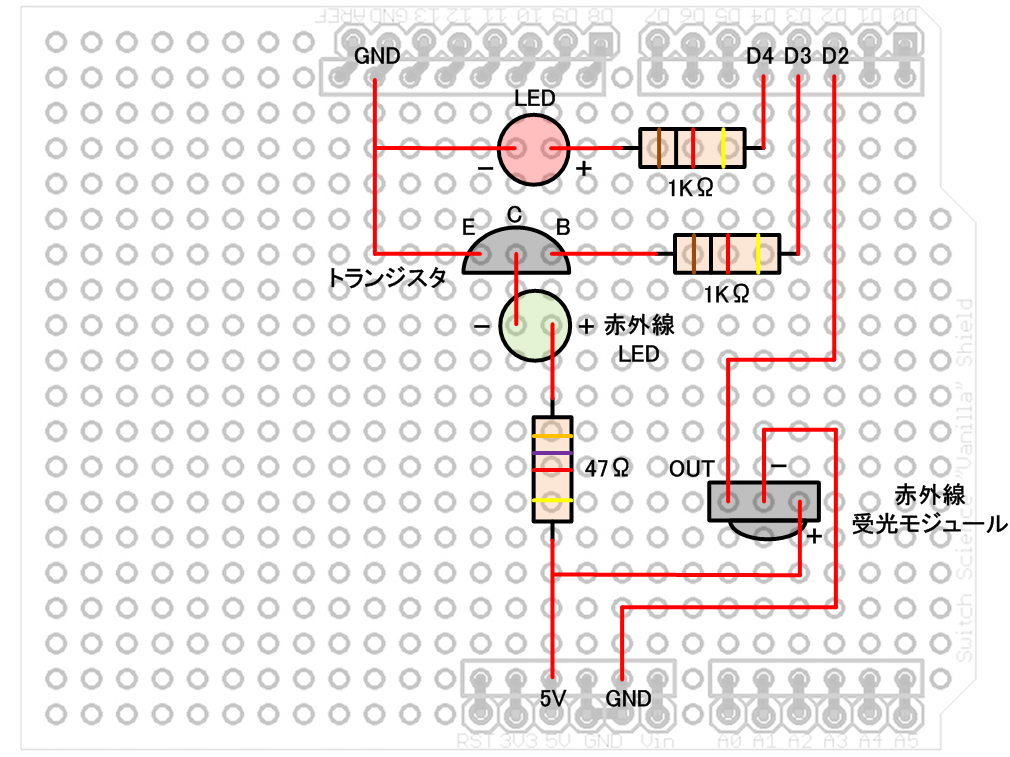
//php if ( is_archive() || is_search() ) : // Only display excerpts for archives and search. ?>
- 部品は基板の表面に設置し、足をホールに差し込み、裏面からハンダ付けします。
- 配線は図の赤線の通りに基板の裏面にスズメッキ線等をハンダ付けすることで行います。
- ピンヘッダ用のランドとその一つ内側のランドはそれぞれパターンが走っていて接続されています。
//php if ( is_archive() || is_search() ) : // Only display excerpts for archives and search. ?>
半田付けをする際の注意点
- 半田付けの際にでる煙(ヒューム)は、なるべく吸わないようにする
- 背の低いものから半田付けをする
- 半田付けの箇所に5秒以上半田コテを当てない
- 適量の半田を流し込み反対面の穴にも半田が行き届くようにする
//php if ( is_archive() || is_search() ) : // Only display excerpts for archives and search. ?>